Flashing at dormers is one of the most overlooked but critical aspects of roof construction. The point where the wall and the roof meet can become a perfect trap for leaks, water damage, and long-term headaches if not handled with precision. Dormer flashing details are not just about keeping water out, but about protecting vulnerable areas where materials intersect.
This guide breaks down how to flash a dormer properly, what flashing materials work best, common mistakes to avoid, and why following best practices ensures durability, code compliance, and peace of mind for builders and remodelers. If you are involved in new construction or roof installation projects, mastering dormer flashing is essential.
Why is dormer flashing critical in roof construction?
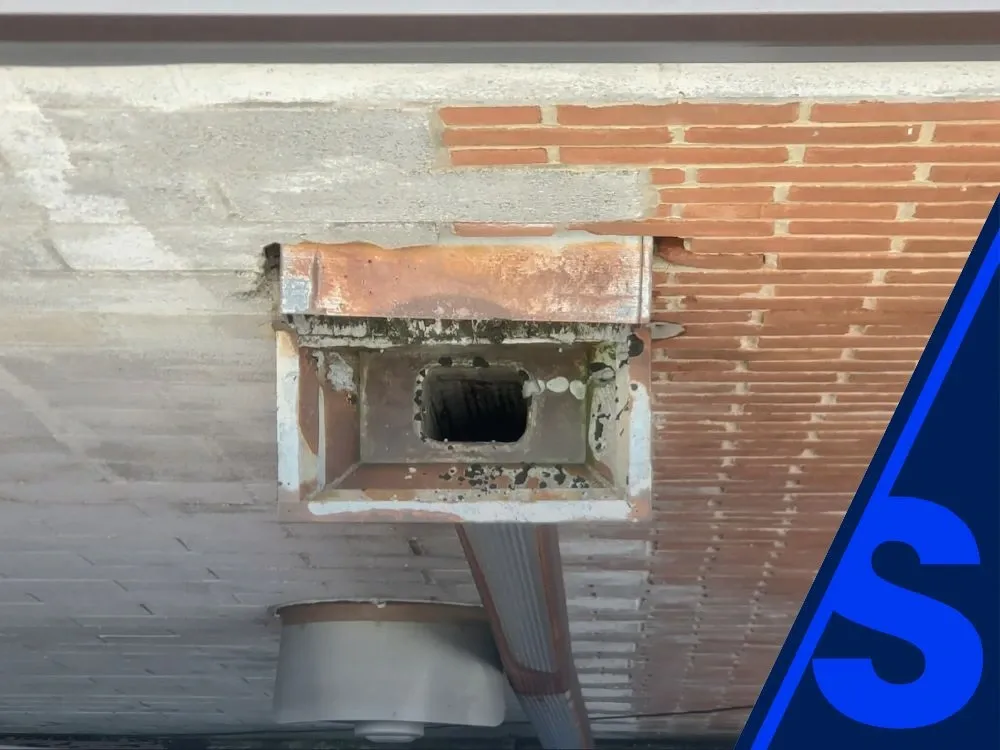
A dormer introduces multiple intersections on a roof. Every side of the dormer creates a potential entry point for water if not protected correctly. Roof flashing at these transitions acts as the shield that keeps water moving away from the wall and onto the roof instead of infiltrating the structure.
Builders know that vulnerable areas like the sides of the dormer and the front wall can quickly fail without the right approach. Step flashing, apron flashing, and base flashing are all designed to guide water away from the wall and onto the roof surface. Without these layers, the dormer quickly becomes a weak point in the roofing system.
What happens if you fail to flash a dormer correctly?

If dormer flashing is skipped or done poorly, the consequences show up quickly. Water infiltration begins at the end of the shingle where it meets a vertical surface like a wall. Once water seeps in, it can saturate the underlayment, compromise the roof deck, and spread into soffit or rafter cavities.
Improper overlap of a piece of step flashing or careless use of sealant instead of proper step flashing on top can also allow leaks to develop. Over time, these mistakes can cause structural water damage, corrosion of fasteners, and even mold inside the building. For a remodeler working in coastal areas, ignoring these details can lead to callbacks, warranty claims, and unhappy clients.
What are the main types of flashing used at dormers?
There are several flashing materials and methods used to protect dormers. Each has its role depending on the geometry and roofing material.
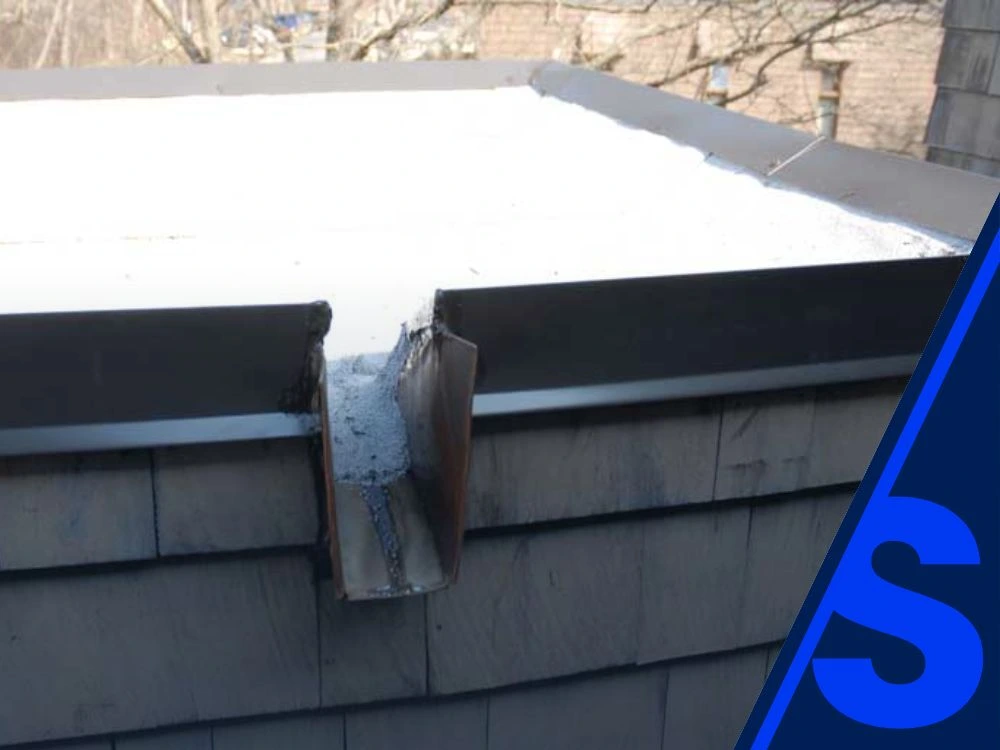
- Step flashing: The most common type, installed with each shingle course, overlapping to guide water away from the wall.
- Apron flashing: Installed at the front wall of the dormer, where it meets the main roof, creating a watertight barrier.
- Base flashing: Used along vertical surfaces to prevent water infiltration where the wall and the roof connect.
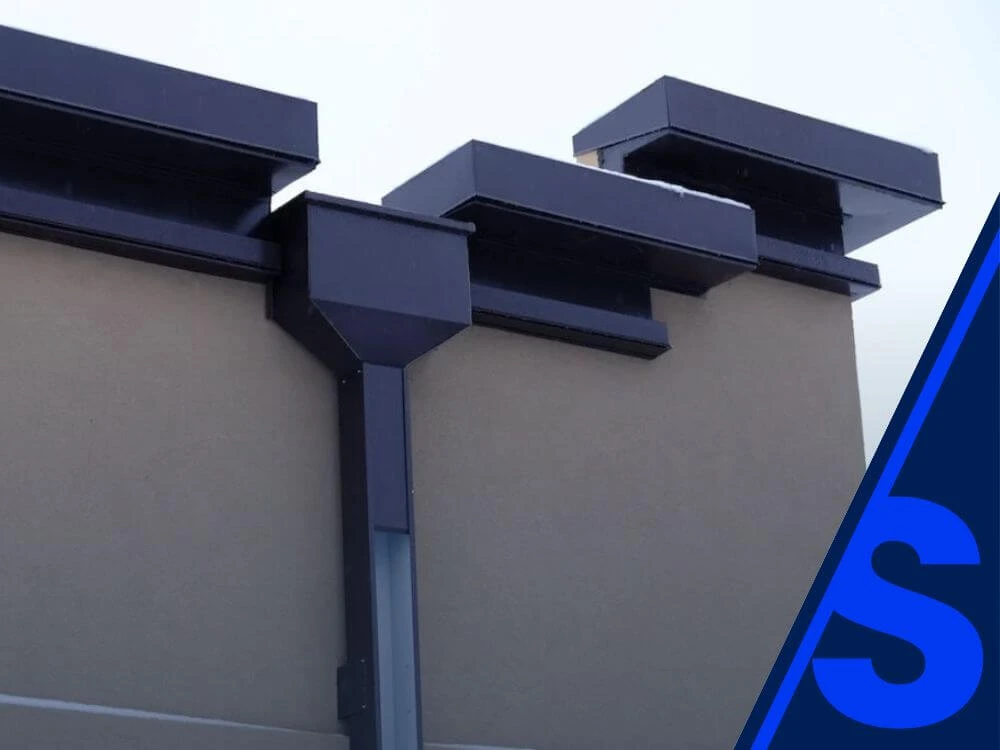
- Cap flashing: Often placed over step flashing to create an additional watertight layer.
- Closure flashing: Applied in critical areas like the front and side walls to close gaps.
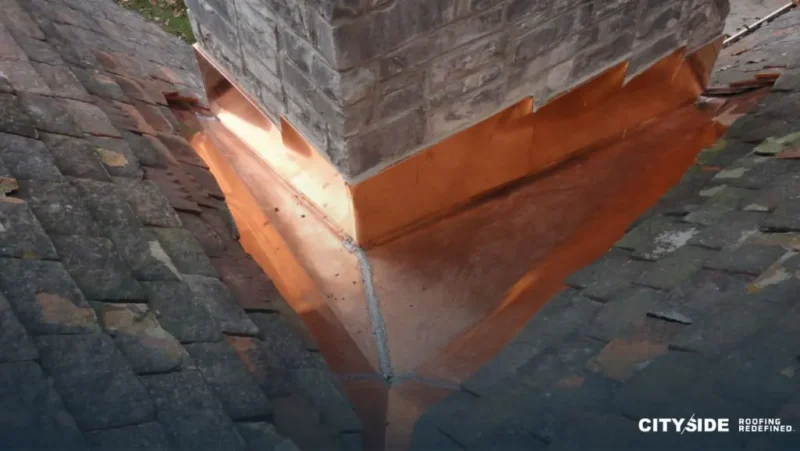
Metal flashing options range from galvanized steel to copper flashing or PVC-coated products. Galvanized steel is common for standard installations, while copper flashing is often specified for high-end projects or where longevity in coastal areas is critical.
How do step flashing and apron flashing work together?
Step flashing is installed as roof shingles are laid, with each step flashing piece overlapping the shingle exposure below it. This layered system ensures water sheds naturally onto the roof surface and away from the wall. Step flashing protects the sides of the dormer where shingles meet the vertical surface like a wall.
At the front wall, apron flashing is installed to keep water from pooling at the roof leg. This is one of the most critical areas of dormer flashing because water naturally flows toward the front wall. The apron directs drainage onto the roof shingles below, preventing leaks at this vulnerable area.
When step flashing and apron flashing are properly integrated, the system works together to guide water off the roof and away from the wall.
What flashing materials are best for dormer applications?
Choosing the right flashing materials depends on project requirements and environmental exposure. For builders and roofing contractors, the decision often comes down to balancing cost, durability, and ease of installing.
- Galvanized steel: Affordable and durable for most projects, with minimum thickness requirements set by building code.
- Copper flashing: Corrosion-resistant and long-lasting, ideal for coastal areas but more expensive. Copper requires special techniques since flashing is soldered at joints.
- PVC or coated flashing: Useful in remodeler projects where chemical resistance and flexibility are needed.
Membrane products like peel-and-stick membrane or self-adhered underlayment are also used as secondary protection. These materials sheathe the roof deck and add redundancy, especially in critical areas near dormers, skylight openings, or chimneys.
For guidance on selecting materials suited to your climate and code, see CitySide Roofing Contractor Services.
How should you prepare a dormer for flashing installation?
Preparation is one of the most overlooked steps in installing dormer flashing. Start by ensuring the roof deck is solid and free from water damage. The wall surfaces should be wrapped in housewrap, with laps layered away from the wall to guide water onto the roof.
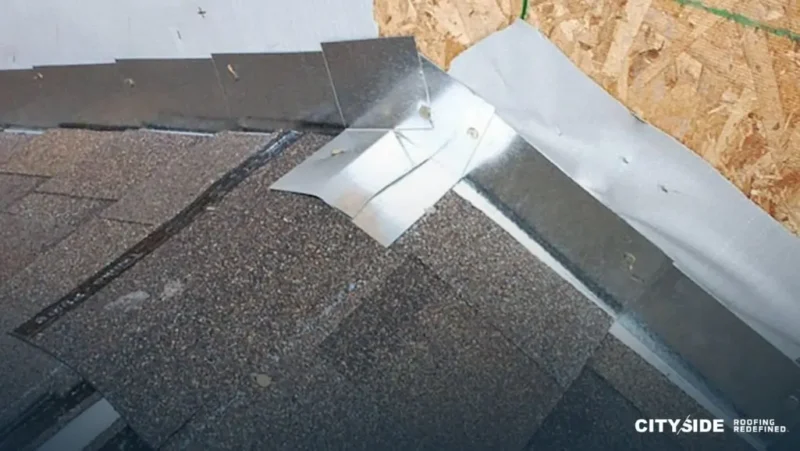
Before installing step flashing, apply underlayment or a peel-and-stick membrane at the transition points. This creates redundancy in case water bypasses the flashing system. Install roof shingles in proper sequence, integrating each piece of step flashing with the shingle exposure.
Always nail the flashing to the roof deck and not the wall. Driving a nail into siding or other vertical surfaces can puncture the waterproof barrier and create a leak path.
What are common mistakes when flashing a dormer?
Several mistakes occur when builders or remodelers try to rush dormer installations:
- Over-reliance on sealant instead of step flashing or cap flashing. Sealant deteriorates and cannot provide long-term watertight protection.
- Misaligned overlap or lap between step flashing pieces, allowing water to flow behind the flashing.
- Failure to extend apron flashing beyond the sides of the dormer. This creates vulnerable areas where water can enter.
- Ignoring the need for closure flashing at the front and side walls.
Another common issue is failing to integrate flashing with siding correctly. The siding must overlap flashing to keep water away from the wall.
How can membranes improve dormer flashing performance?
Peel-and-stick membrane products are often used as added protection under step flashing and apron flashing. These membranes adhere directly to the roof deck and wall, creating a secondary watertight barrier.
When combined with properly overlapped flashings, membranes keep water from infiltrating even if a shingle or step flashing piece is displaced. Builders often use membranes around dormers, chimneys, skylight openings, and other critical areas where flashing protects against leaks.
Using membranes does not replace flashing, but it adds a redundancy layer that helps prevent water infiltration in vulnerable areas. For more information, see CitySide Roof Installation Insights.
What role do nails and fasteners play in flashing?
The way flashing is fastened has a huge impact on durability. A roofer should nail the flashing through the roof leg into the roof deck, never through siding or vertical surfaces. This prevents puncturing the wall’s waterproofing system.
Nails should be corrosion-resistant to avoid long-term failure. In areas where copper flashing is used, rivets or solder may be required to secure joints. The goal is always to keep water away from the wall while ensuring the flashing system remains watertight for decades.
Improper fastening can compromise the overlay of flashing pieces and increase the risk of leaks.
How do you address flashing at chimneys, skylights, and vents?
Flashing at dormers often resembles the challenges seen around chimneys, skylights, and vent penetrations. The principle is the same: flashing protects by creating overlapping layers that guide water onto the roof surface.
For example, step flashing is used along the sides of a skylight, while apron flashing is applied at the front wall. The same approach applies to dormers. By integrating underlayment, closure flashing, and cap flashing where needed, you create redundancy in case of failure.
These methods are part of industry best practices outlined by roofing contractors and are critical in preventing water infiltration in all roof assemblies.
What are the best practices for flashing dormers?
Best practices for flashing dormers include:
- Always integrate step flashing with shingles, never using continuous flashing where multiple pieces are needed.
- Maintain minimum thickness for flashing materials per code.
- Apply peel-and-stick membrane at critical areas before flashing installation.
- Overlap each piece of step flashing with the end of the shingle above.
- Use closure flashing and cap flashing at the front wall to cover vulnerable joints.
- Verify proper siding overlay, ensuring flashing extends away from the wall.
These steps are part of a builder’s responsibility to prevent water infiltration and reduce callbacks. For detailed builder support, check CitySide Expert Roofing Advice.
Key points to remember
- Dormer flashing details must address all sides of the dormer, including the front wall and sides.
- Step flashing, apron flashing, and closure flashing work together to guide water onto the roof.
- Flashing protects vulnerable areas by keeping water away from the wall and onto the roof shingles.
- Membranes like peel-and-stick underlayment provide added redundancy but do not replace flashing.
- Always nail the flashing into the roof deck, never into siding.
- Using proper flashing materials such as copper flashing or galvanized steel ensures long-term watertight performance.
- Builders and remodelers must follow best practices to keep water from entering critical areas at dormers, skylights, and chimneys.
For builders, remodelers, and contractors, mastering dormer flashing means fewer callbacks, better drainage, and roofs that last. If you want expert advice, code-compliant installations, or project-specific guidance, contact CitySide Roofing today.